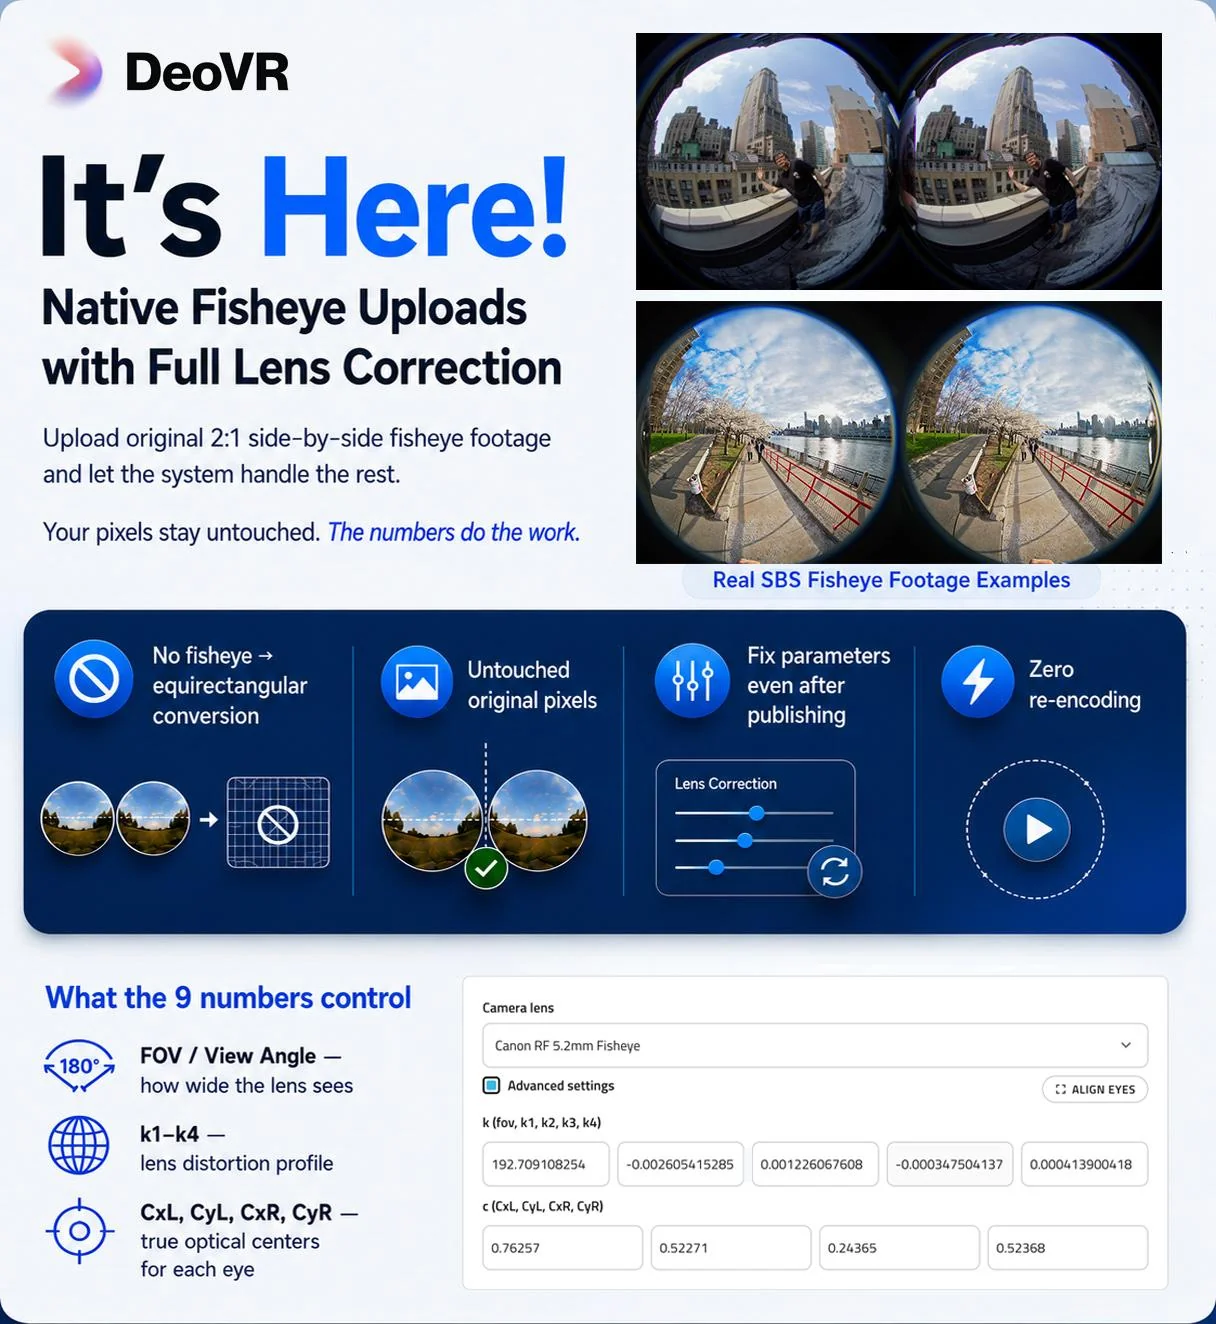
Starting today, DeoVR supports direct fisheye uploads with per-lens correction for VR180 creators. Pick your lens from a preset, or enter nine numbers, and DeoVR projects your original footage correctly at playback time.
Until now, publishing VR180 meant a fisheye-to-equirectangular conversion first: it adds hours of rendering time and a quality tax, because every remap resamples your pixels. Worst of all, it was irreversible: if your distortion correction was off or the center was a few pixels out, the error was baked into the delivered file. Your only fix was to go back and re-render everything.
Now the correction is just metadata. The player projects your untouched original pixels live. Noticed a flaw after publishing? Edit a number and it’s fixed for every viewer, instantly, with zero re-encoding.
How to use it
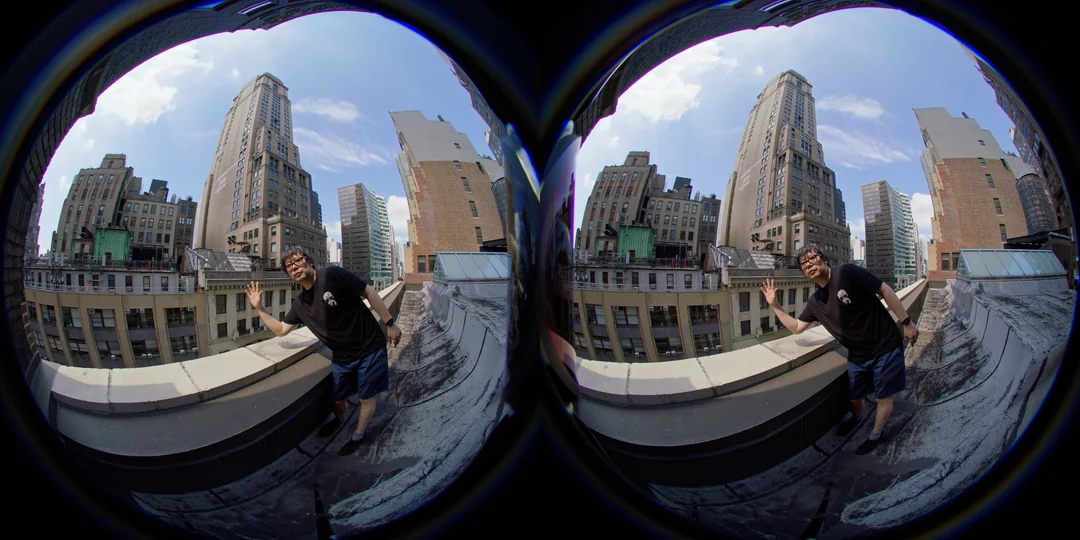
Edit exactly the way you always do except you do not need to do any projection conversion, eye swap, or stereo alignment during editing. Output your edited video as 2:1 side-by-side fisheye (see the sample screenshots below).
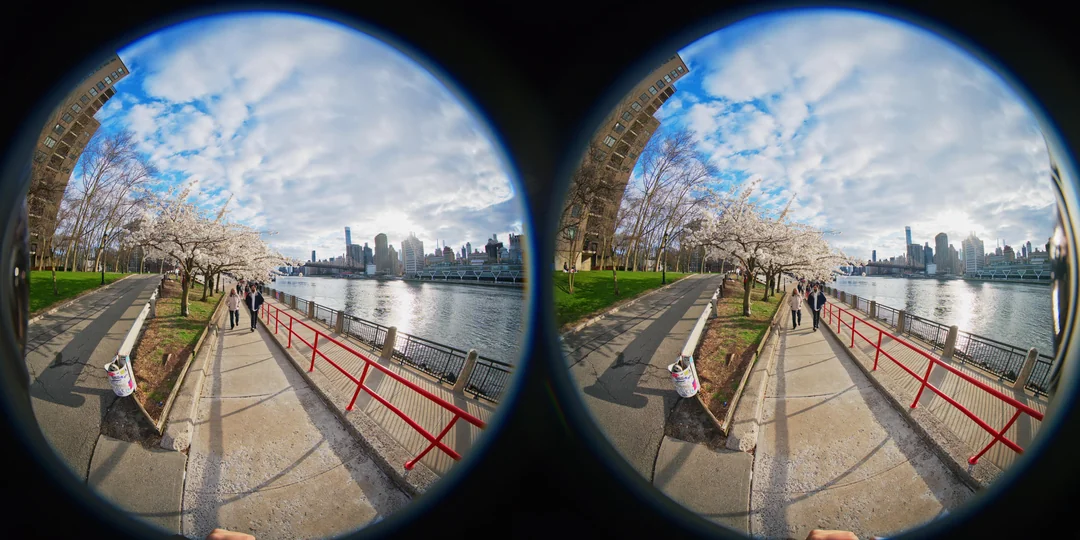
(Step 1: Output your edited video as 2:1 side-by-side fisheye(8192*4096 etc)
Then, when uploading:
-
Set Video format to Side-by-Side and View angle to 190.
-
Pick your Camera lens preset (Canon RF 5.2mm Dual Fisheye etc.).
-
Already know your rig's numbers? Enter them under Advanced settings. If not, click Align eyes — a web interface opens where you align the two eyes visually, with a preview that matches exactly what viewers will see in the headset. Hit Apply, and the parameters fill themselves in.
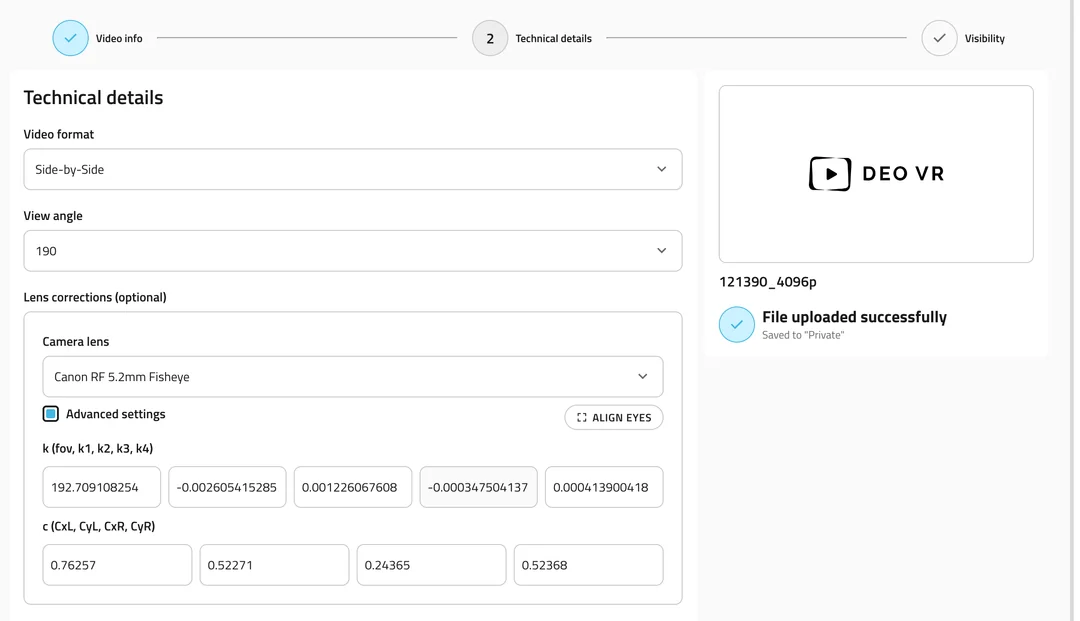
(Step 2: when uploading video, set Video format to Side-by-Side and View angle to 190 and pick a lens, then click align eyes.)
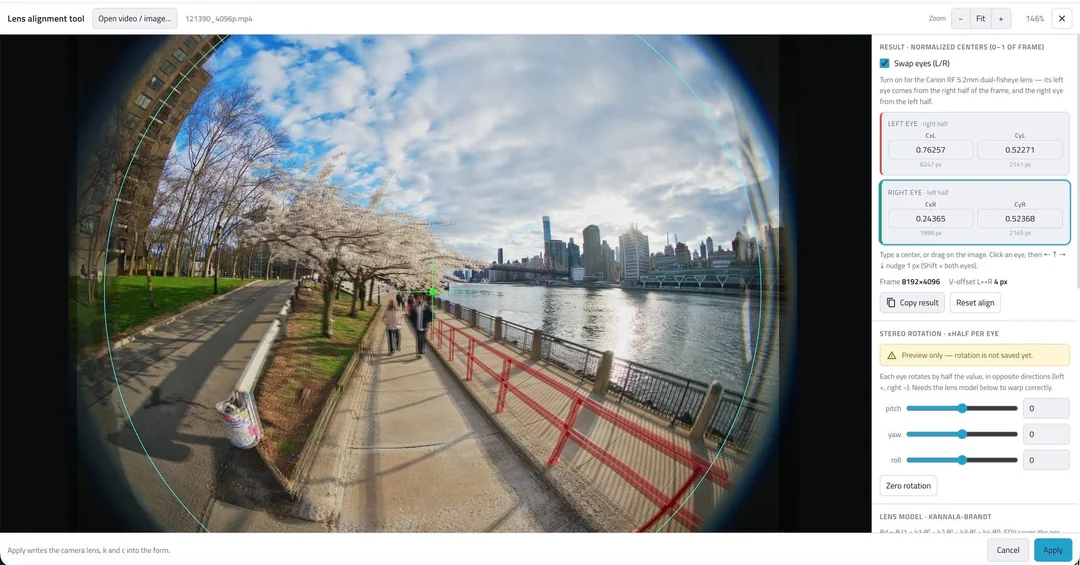
(Do your alignment here, you can tweak/preview every paramaters in various view modes, then click apply)
One rig, one set of parameters: the values you dial in will generally hold for all footage from that rig, so treat this as a one-time job, not a per-video chore.
And the best part: the parameters stay editable after you publish. No need to get them perfect on the first try — fix them any time, and every viewer gets the fix instantly, no re-encode, no re-upload.
What the nine numbers mean
View angle / FOV (1), how wide your lens sees. The total angle across the image circle touching the shorter side of each eye’s frame. 180 = a hemisphere, 190 = a hemisphere plus wrap-around.
k1–k4 (4), your lens’s fingerprint. No real fisheye bends light exactly like the textbook curve. These four coefficients describe how your glass deviates from ideal: a touch of compression here, a stretch toward the rim there. All zeros = ideal fisheye(equidistant fisheye). Every copy of a given lens model bends light near enough the same way, so presets carry these for you.
C numbers: CxL, CyL, CxR, CyR (4), where the bullseye really is, per eye.
Here’s why these are not in the presets: FOV and k describe the lens design, but the center describes your individual camera. Assembly tolerances mean every unit’s sensor sits a few pixels differently behind its lens, and the left and right eyes are off differently. Two cameras of the identical model need different centers.
A wrong center is what makes verticals bow near the edges and the horizon drift as you look around. These four values, as fractions of the frame, point the projection at each eye’s true optical center.
Getting your numbers manually
Using a custom solution?
-
k1–k4: calibrate with Gyroflow’s Lens Calibrator. It is free, open-source, and takes one chessboard clip per lens. It uses the same fisheye model DeoVR does, so the coefficients drop straight in.
-
FOV: take your Gyroflow calibration into our web tool. Enter the calibrated focal length and it computes your exact FOV, with a live angular grid overlaid on your own frame to verify.
-
CxL/CyL/CxR/CyR: the same web tool finds your per-eye centers visually and outputs them in exactly the format these fields expect.
check out this footage from a Custom 220 degrees FOV solution, perfected handled by our new lens correction system.
Current limitations and What’s next
This release covers VR180 videos that was shot on a single camera rig, it's just the first step, Here's what's coming:
-
Rotational offset correction. Three more parameters (yaw / tilt / roll) for aligning the two eyes on rigs where the lenses aren't perfectly parallel. Think all the VR180 mods comming from 360 cameras, or even BM Cine Immersive Camera.
-
Per-shot parameters. Everything above, settable per time range. Import the timeline from your editing software (it already knows where your cuts are) or let us auto-detect them — then step through your video shot by shot and dial in each one. Keyframing inside a shot is rarely needed, but it's on the list too.
-
Parametric masks, fades and transitions. Stop baking masks into your video file. Masks become runtime metadata like everything else — editable after publishing, and per-shot, so different scenes can carry different masks. Same for fades and transitions: nothing burned in, everything rendered at play time.
-
Runtime lens patch. With lens geometry perfectly aligned, edge patching (covering each eye's blind edge with the other eye's view) becomes a handful of parameters instead of a rendering pass — adjustable, reversible, per shot.
-
Titles and 2D/3D overlays. Rendered at play time as a layer above your video — create and edit them right in the web interface, no re-encode, no re-upload.
Every one of these follows the same rule: your pixels stay untouched; metadata does the work.
Let me know what you think! Step by step tutorial comming soon, Stay tuned! Big thanks to the DeoVR team for bring my idea alive💪