Guide: Interpolation at DeoVR & upgrading to 60/120FPS using the Twixtor plugin
DeoVR aims to deliver the smoothest, most immersive VR experience possible. One major improvement we’ve made is automatic frame interpolation for videos with lower framerates. We'll also explain how to use the Twixtor plugin to convert your footage to 60FPS or even 120FPS.

What is interpolation in VR?
The goal for smooth VR video is to achieve a frame rate (FPS) for the footage that matches the headset's refresh rate. Interpolating the video is the best approach.
- Interpolation is a technique that uses motion estimation to create new unique frames that lie halfway between the originals.
- Each new frame is a motion-cloned synthesis capturing natural transitions - subtle head turn in VR, camera pan - without tearing.
-
The result is fluid, immersive playback, reducing judder and easing visual strain in VR headsets.
Framerate and refresh rate
The best results come from interpolating video by a factor of two. For example, 60FPS footage can be interpolated to 120FPS to match the refresh rate of headsets like the Quest 3S, Quest 3 or Valve Index, or to 90FPS for devices like the Quest 2, Rift, or HTC Vive.
Note: 120FPS video can only be watched at 5792x2896 px with 8K decoders.
When 60FPS video is viewed on a 120Hz display, each frame is simply shown twice. But interpolating to 120FPS allows every frame to be unique, resulting in noticeably smoother playback.
Important:
- Avoid simply duplicating frames, as this does nothing to improve visual quality and only increases file size unnecessarily.
- It’s not recommended to interpolate videos when there is no smooth movement between the frames. The interpolation process will not be able to generate valid intermediate frames in such cases.
Find out more about FPS and framerate at our dedicated blog article.
Interpolation at DeoVR
At DeoVR, we’re always working to deliver the smoothest, most immersive VR experience possible. One major improvement we’ve made is automatic frame interpolation using ffmpeg for videos with lower framerates (25FPS or 30FPS). The process estimates motion between existing frames and fills in the gaps, increasing the perceived frame rate.
Automatic interpolation enabled by default
DeoVR's automatic interpolation ensures your viewers see it in its smoothest possible form. Currently, 30FPS footage will be upgraded to 60FPS (and 25FPS to 50FPS).
Note: If your footage is 60FPS then you should ignore the Interpolate to 60 FPS option at the upload screen.
Option to disable automatic interpolation
Creators now have the option to disable automatic 30 → 60 FPS interpolation on their videos. This new toggle, enabled by default, provides greater control over content presentation. This allows creators to preserve the original frame rate if they prefer.
Important: Never increase your FPS framerate without using interpolation techniques. It only increases the file size and delivers zero benefit visually.
When is interpolation required?
Some cameras, like the ZCam K1 Pro and Vuze XR, capture their highest resolution (5400x2700px) at 30FPS. In these cases, it's recommended to interpolate the footage to 60FPS for smoother playback.
Be sure to increase the frame rate by a factor of 2 rather than setting a fixed 60FPS, since these cameras typically shoot at 29.97FPS. This means the correct target is 59.94FPS for an accurate match.
For the best results, interpolate each camera’s fisheye footage before editing or stitching. While this adds time to the workflow, it can significantly improve quality and reduce distortion.
Using the Twixtor Plugin for 60FPS and 120FPS framerate
This frame rate interpolation technique uses the Twixtor plugin, which works with various editing software. It algorithmically increases the framerate by generating intermediary frames based on motion between existing ones. Converting 30FPS footage to 60FPS results in smoother motion and a more stable visual experience.
When done correctly, the results are so precise that most viewers can't tell the difference from native 60FPS. However, it's a computationally intensive process - interpolating 60 minutes of 5K video can take several hours.
In VR, 60FPS is widely considered the minimum standard for comfortable viewing.
How To Use:
-
Import a video file. Drag and drop it into the plugin
-
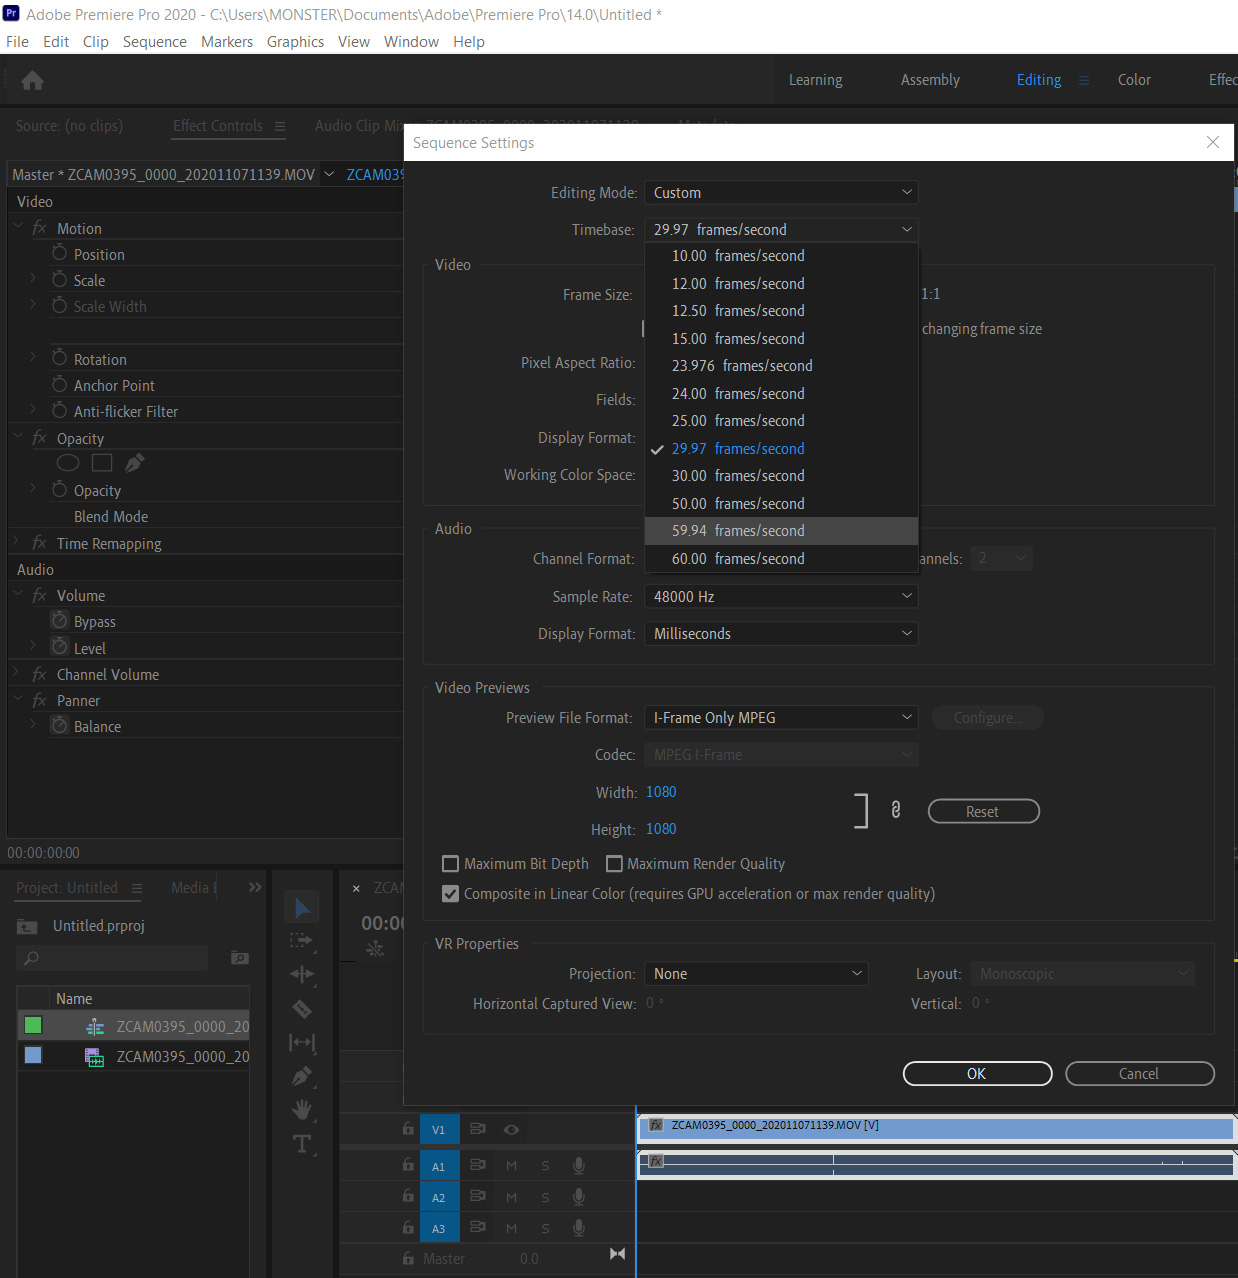
Change the FPS in ‘Sequence > Sequence Settings’ to 59.94 fps
-
Unlink audio/video

-
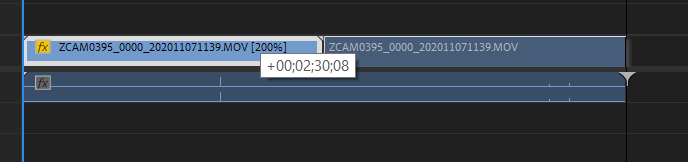
Go to Speed / Duration and change the speed parameter to 200%


-
Copy Fast Track
-
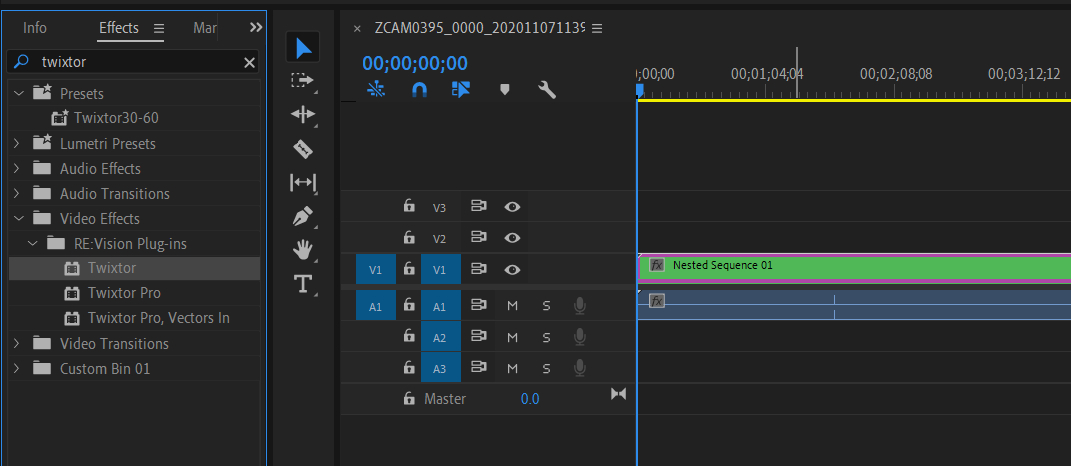
Combine the two video files in Nest

-
Apply the RE:Vision plug-in Twixtor on the resulting Nest
-
Select the Twixtor settings for interpolation. Make sure the Main speed is set to 50%

-
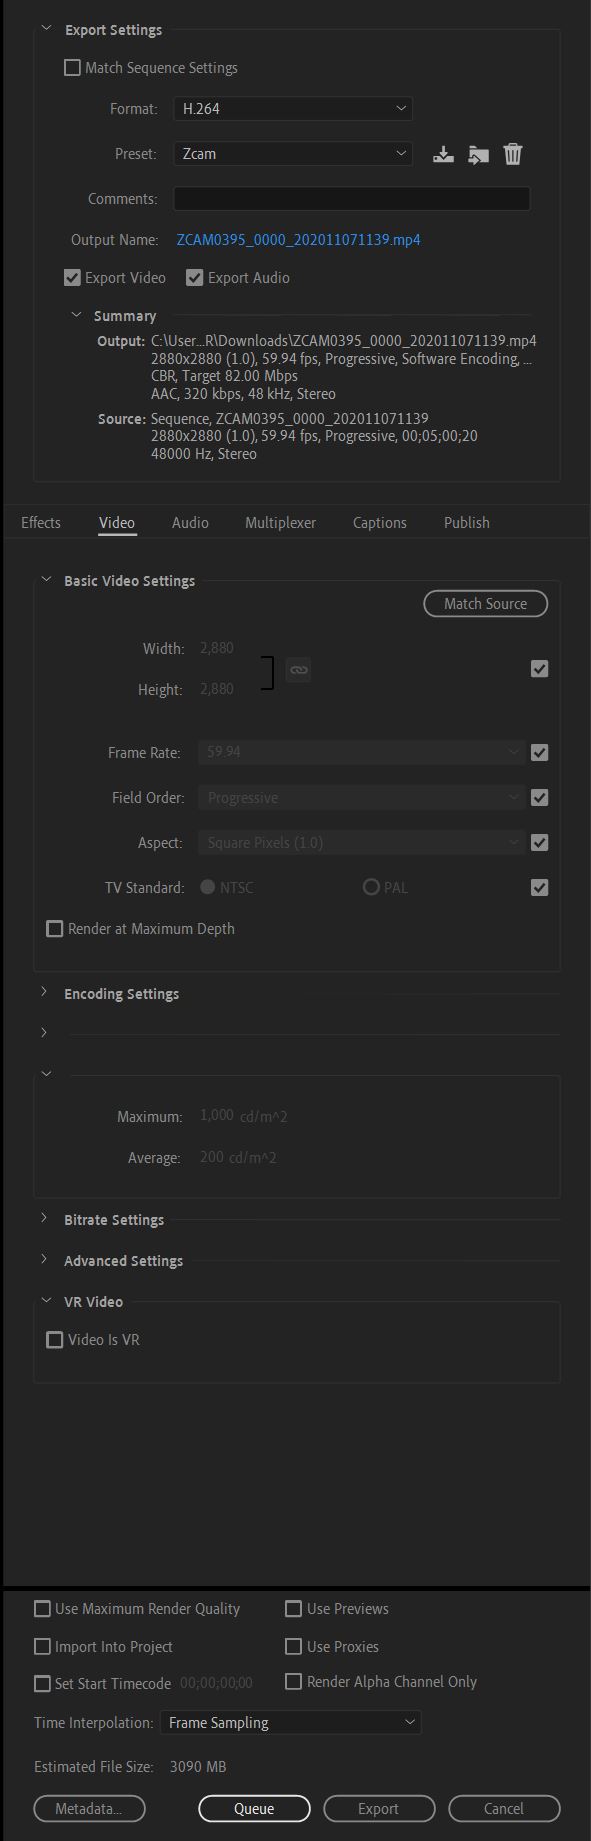
Export settings. These settings are for interpolating RAW files with the Zcam K1pro 180vr camera. In the case of interpolation of an already finished project, you can set the bitrate value you need. Important! The video must be NOT VR. You DO NOT need to check the ’Video is VR’ box.