Tutorial: 6K 200º FOV fish-eye stitching in Mistika Boutique
This guide introduces the new 200° fisheye projection format for VR videos—designed to deliver a more immersive experience at higher pixel efficiency than traditional equirectangular formats. When combined with lens removal techniques, fisheye projection retains more image data with no added costs in file size, rendering, or decoding.

DeoVR’s video player recognizes these fisheye files via filename tags, matching them to optimized projection meshes built from camera lens profiles. This setup ensures the most accurate playback with minimal distortion.
Learn more:
- The DeoVR guide to VR cameras
- Guide to filming POV and on-POV VR with the ZCam K1 Pro camera rigs
- How to edit VR footage for DeoVR
- Guide: How to remove lenses from VR footage in Mistika Boutique
If you need post-production help with your VR content, our expert team can help.
Each camera on the Zcam K2 Pro MKX200 records in 3696x2772 px 60FPS 200° FOV. Fish-eye projection utilizes the full 200º FOV at 5800x2900 px stereo output, which is commercially described as 6K. With the same tutorial you can also work with ZCam K1 Pro VRCA220, MKX220 and MKX200 lenses. 220° lenses will be rendered accordingly. To ensure fish-eye video is recognized by the DeoVR video player add _VRCA220, _MKX220 or _MKX200 to the filename and the correct projection will be used automatically. On the other hand equirectangular distorts the image on the poles, which is then squashed back on a virtual sphere in the player.
Equirectangular projection requires you to choose between a 180º or 360º projection meshes with no other option in between. To utilize the camera's 200º FOV you would have to pack it into a 360º projection mesh at 5400x5400 px, filling large parts of the image with empty pixels, or cut it to 180º at 5400x2700 px. These are the possible formats:
| Left/Right eye | Stitching | Output file | |
|---|---|---|---|
| 180º equirectangular | 2700x2700 | SideBySide | 5400x2700 |
| 200º equirectangular | 5400x2700 | TopBottom | 5400x5400 |
| 200º fish-eye | 2900x2900 | SideBySide | 5800x2900 |
The extra 20º FOV gains of fish-eye together with the “recovered” lens image are crucial when viewing in VR. It adds immersion, which is otherwise broken with empty areas, and compensates for the head movements we naturally make all the time.
Also, fish-eye footage has been shown to be faster to render and decode. The videos are a lower file size and bitrate while providing the same or better quality compared to an equirectangular render.
Although the K2 Pro camera records in 10-bit depth, it’s recommended to render the master file at 8-bit at 100-120Mbps. Original 10-bit footage gives a significant advantage when color grading, even if it is later converted to 8-bit. When 10-bit HDR screen headsets come to market it will be beneficial to release the 10-bit footage. At the moment there’s no advantage to displaying 10-bit video on the 8-bit screen used by current VR headsets and there is no 10-bit headset expected any time soon. It is worth noting that 10-bit videos come at higher file size.
The Oculus Quest 2 and tethered headsets such as the Valve Index or HP Reverb G2 headsets running Nvidia 10xx/20xx/30xx graphics cards can decode up to 8172x4096@60FPS or 8192x8172@30FPS.
Other suggestions:
- Replace the lens visible on the footage with the corresponding part of the image from the other lens and get a video “clean” of lenses (find these in tutorial below).
- Place a watermark on top of the video, but not at the sides, making it less intrusive. Alternatively you can put a watermark on a mask, which won’t be visible in VR (as suggested below).
Mistika Boutique fisheye projection tutorial for Zcam K2 Pro camera
1. Prepare single frames with an overlay of a circle and a cross by positioning it as close as possible to the center of the lens. The diameter of a circle for Zcam K2 Pro is approximately 2850 px.


2. Add a VR Stitch node, set up the cameras and fix the stereo alignment just as you would with equirectangular projection.
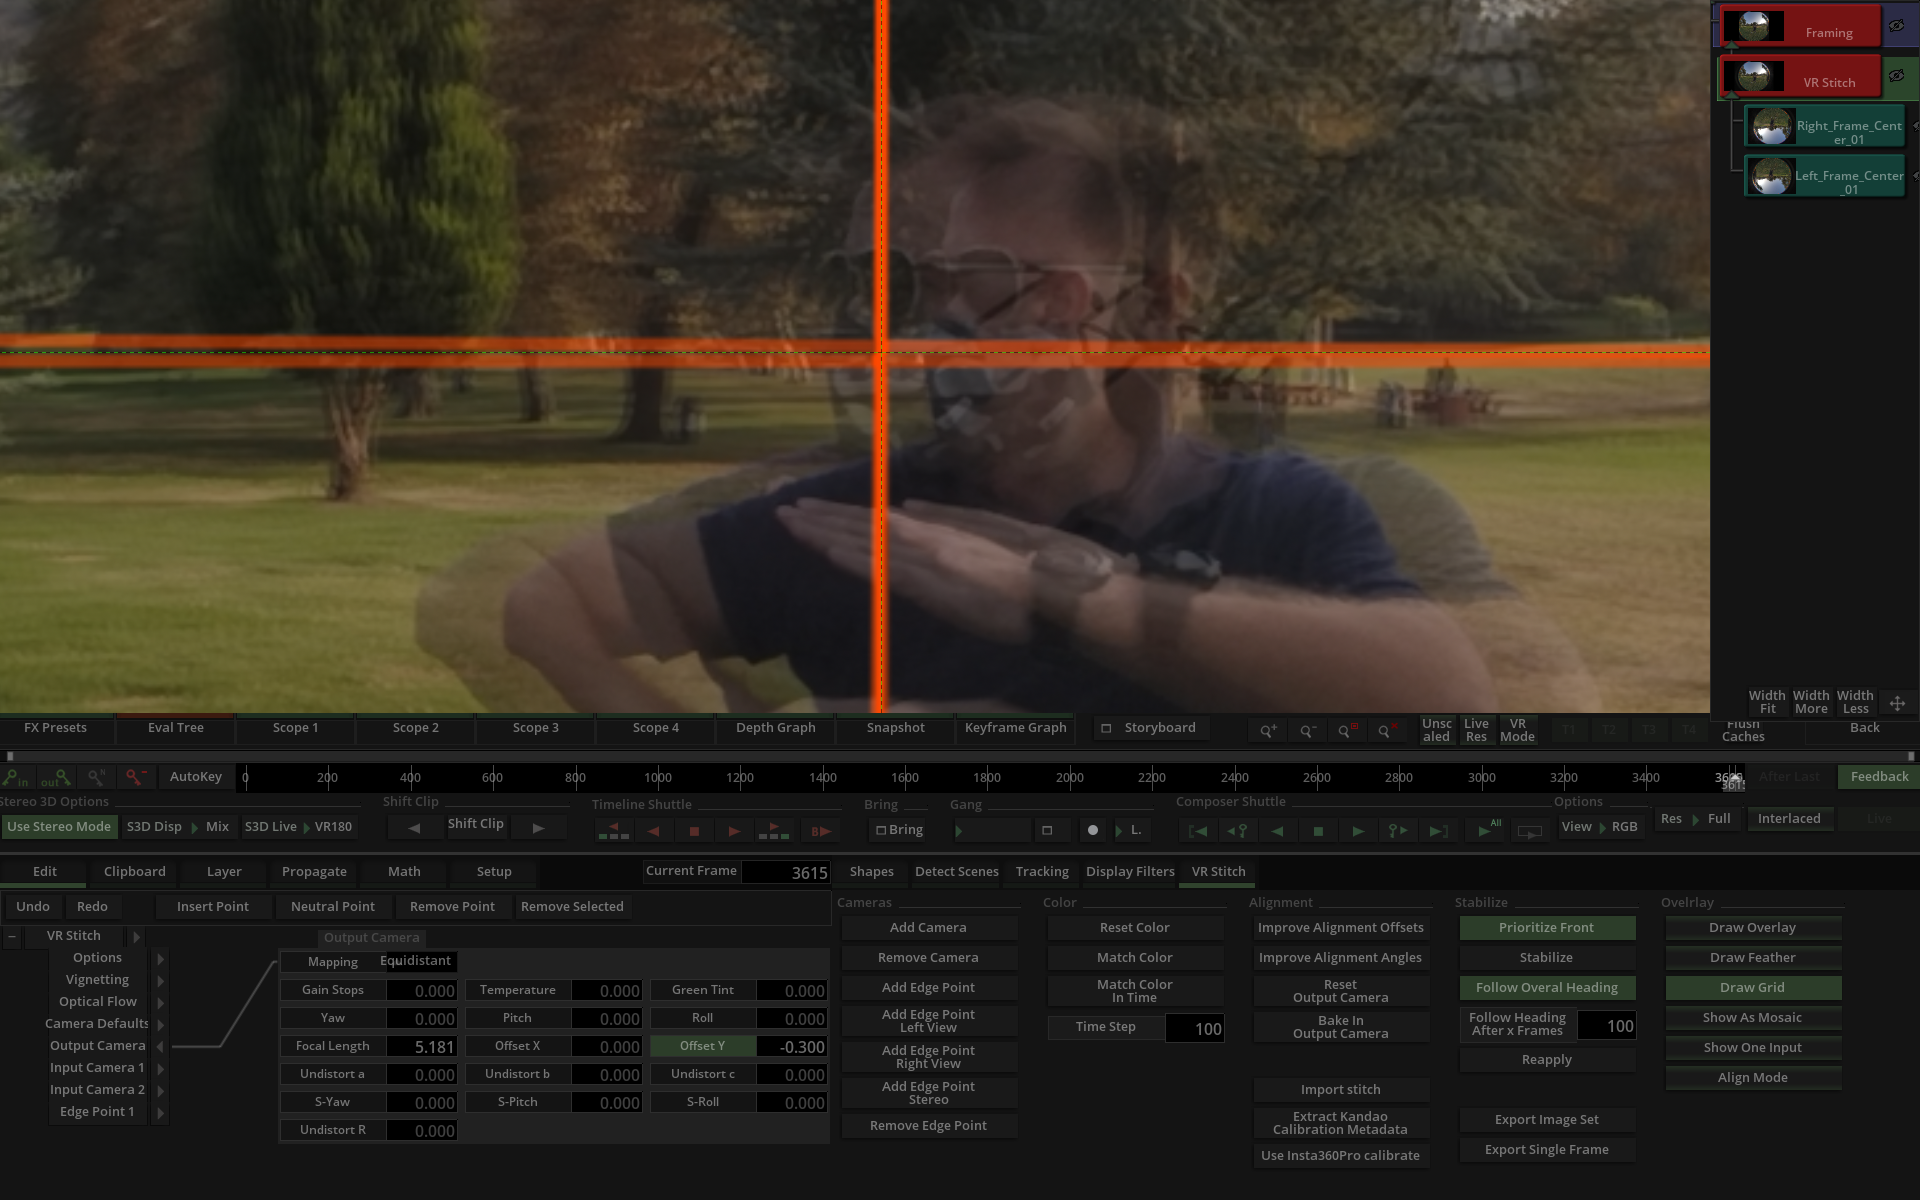
3. Go to VR Stitch -> Output Camera -> Mapping and set it to Equidistant Fisheye.

4. Fit the fisheye into a square. Replace the footage with the frames you prepared in step 1. Add a Framing node over VR Stitch and set its Crop / Left value to 25 and Crop / Right to 75
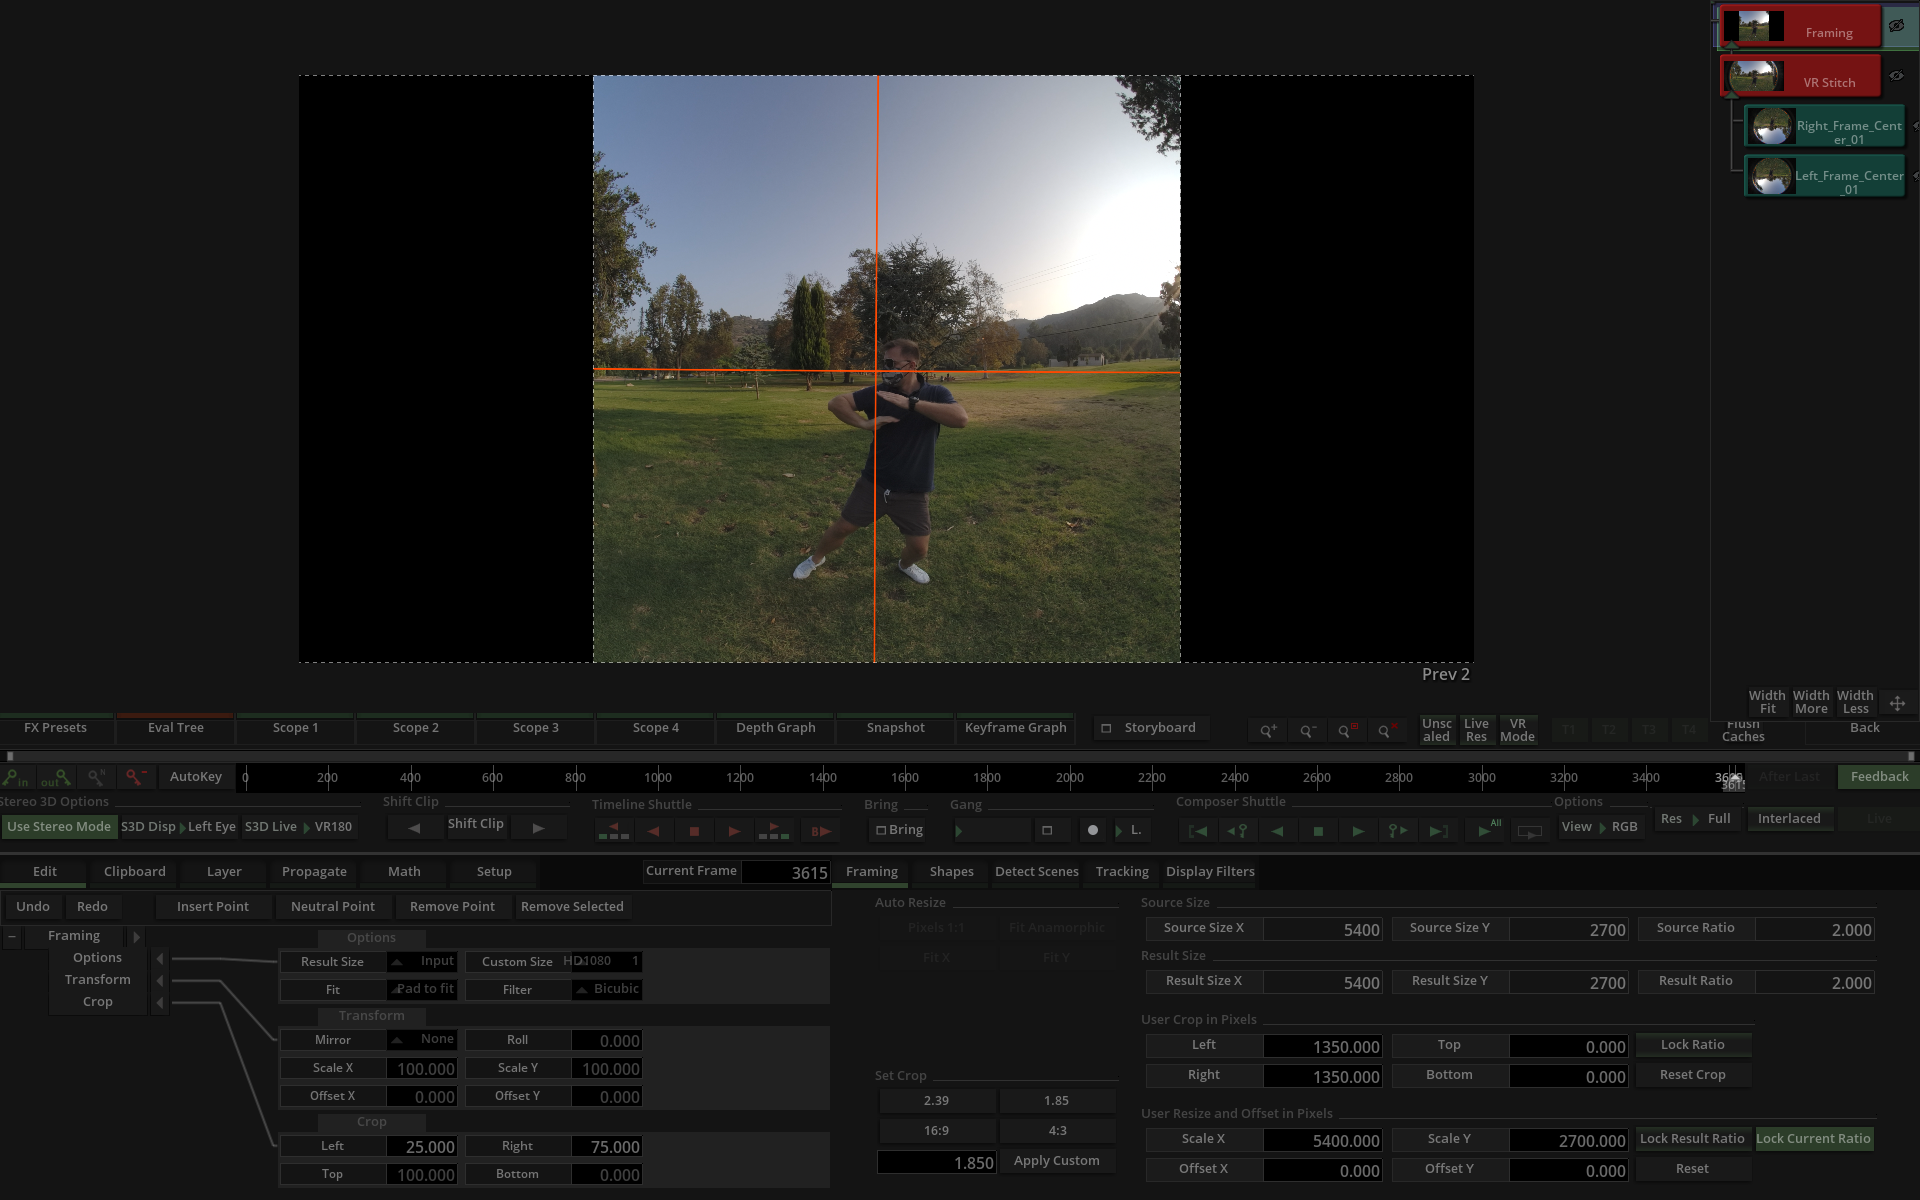
5. Go back to VR Stitch -> Output Camera -> Focal Length and use it as a scale to fit the circle overlay diameter into the bounds of the crop. Also position each Input Camera / Offset X so the overlay circle fits in the crop horizontally. Do this for both cameras!

6. Continue to fit the cameras vertically by adjusting Output Camera / Offset Y. You can make it easier by going to Stereo Mode / Mix and enabling Grid Overlay so you can see both vertical centers, and move their average position on the center grid line.
7. Replace frames with overlay back to footage and render out.
Editing Footage For DeoVR
We have a detailed guide specifically for preparing your footage so it will look its best on the DeoVR platform. Follow these step-by-step instructions for both the Z CAM K2Pro and Canon R5 C.
