Tutorial: How to export 360 videos from Insta360 and upload to DeoVR
360° video creators often need a smooth workflow to get their content from Insta360 Studio to DeoVR in the best quality possible. This guide walks you through the entire process - from importing and editing your videos in Insta360 Studio to exporting and uploading them to DeoVR.
Step 1: Install Insta360 Studio
Download and install the latest version of Insta360 Studio from the official website
Launch the app after installation.
Step 2: Import Your Footage
Open Insta360 Studio and import your 360° video files.

Switch between Media Mode and Project Mode from the top middle of the interface.

In either mode, you can:
- Trim your videos.
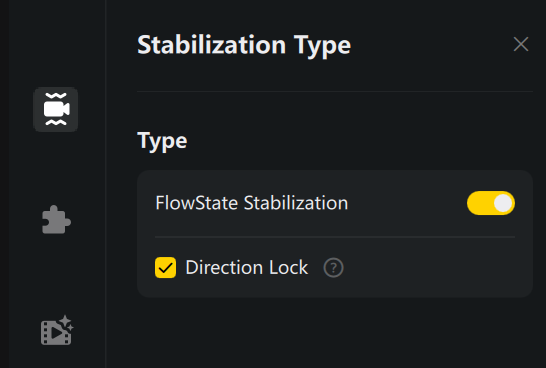
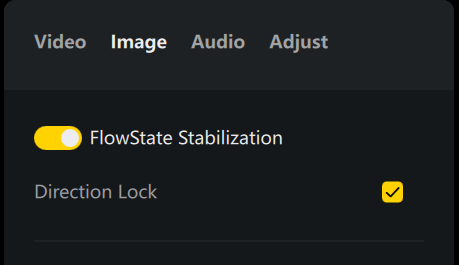
- Stabilize using FlowState.
- Set Direction Lock to control how the center view behaves.
Step 3: Editing Basics
Single Clip:
In Media Mode, trim the start and end of the video by dragging the in/out points on the timeline.
Multiple Clips:
- First, trim each clip in Media Mode.
- Then switch to Project Mode to combine them on the timeline.
- You can also trim clips directly on the timeline in Project Mode.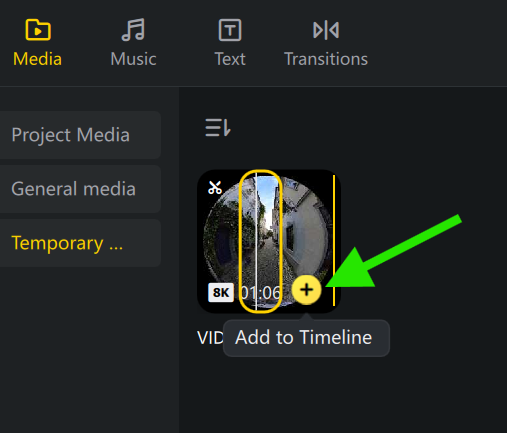
Stabilization:
Keep FlowState Stabilization ON for all moving shots to avoid motion sickness.
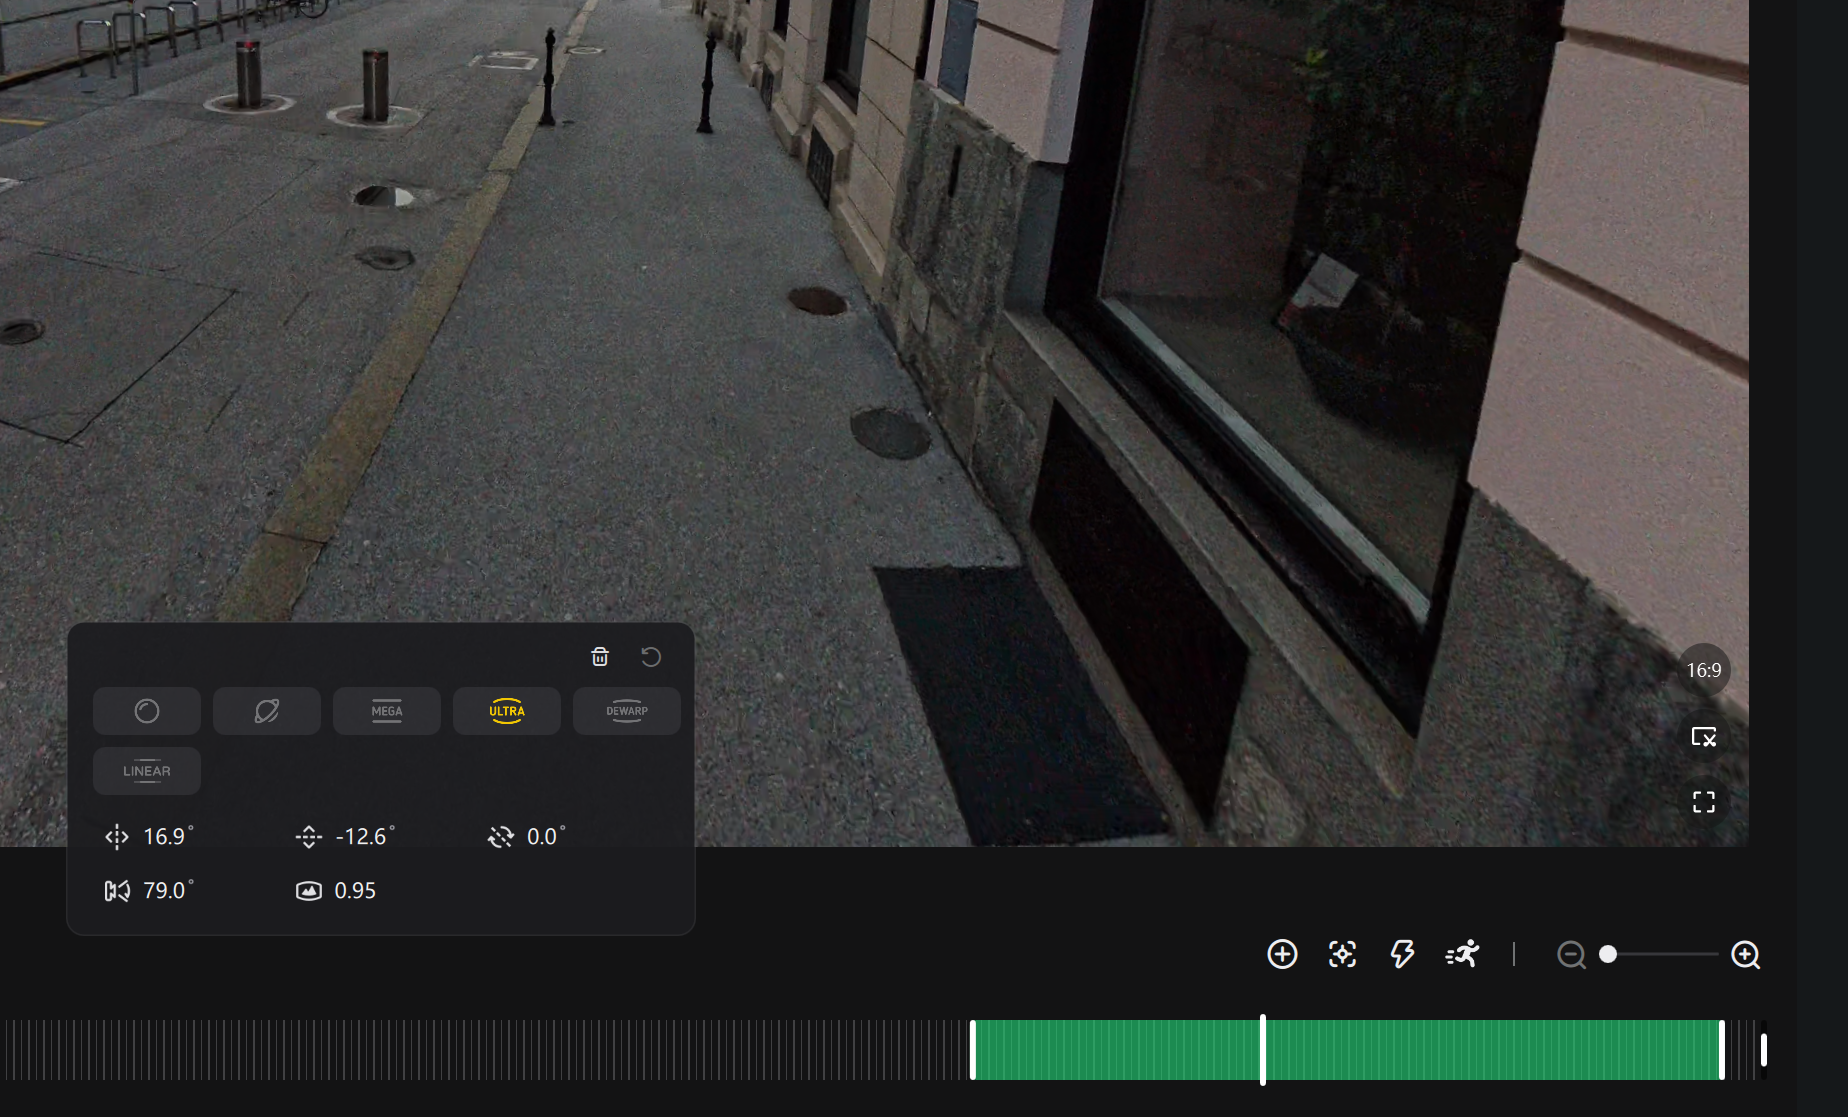
Step 4: Adjust View and Keyframes

Direction Lock:
- ON: View follows the camera direction.
- OFF: View remains static regardless of camera movement.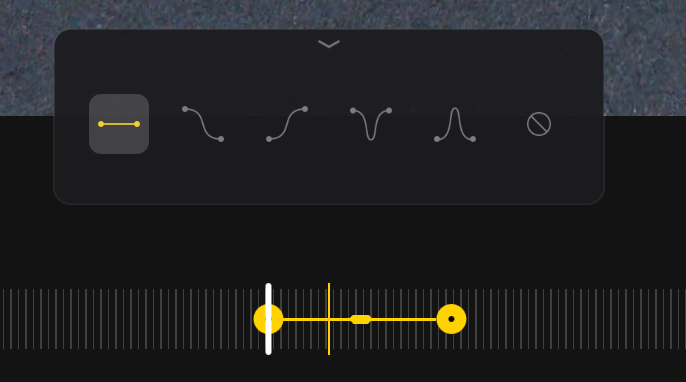
Manual Keyframe Animation:
- In Media Mode, click the Keyframe button (plus sign inside a circle) above the timeline.
- Move to your starting point and add a keyframe.
- Rotate the preview image to your desired end view and add another keyframe.
- Play the section to preview the animation.
To adjust animation smoothness, click between two keyframes and choose from the easing presets.
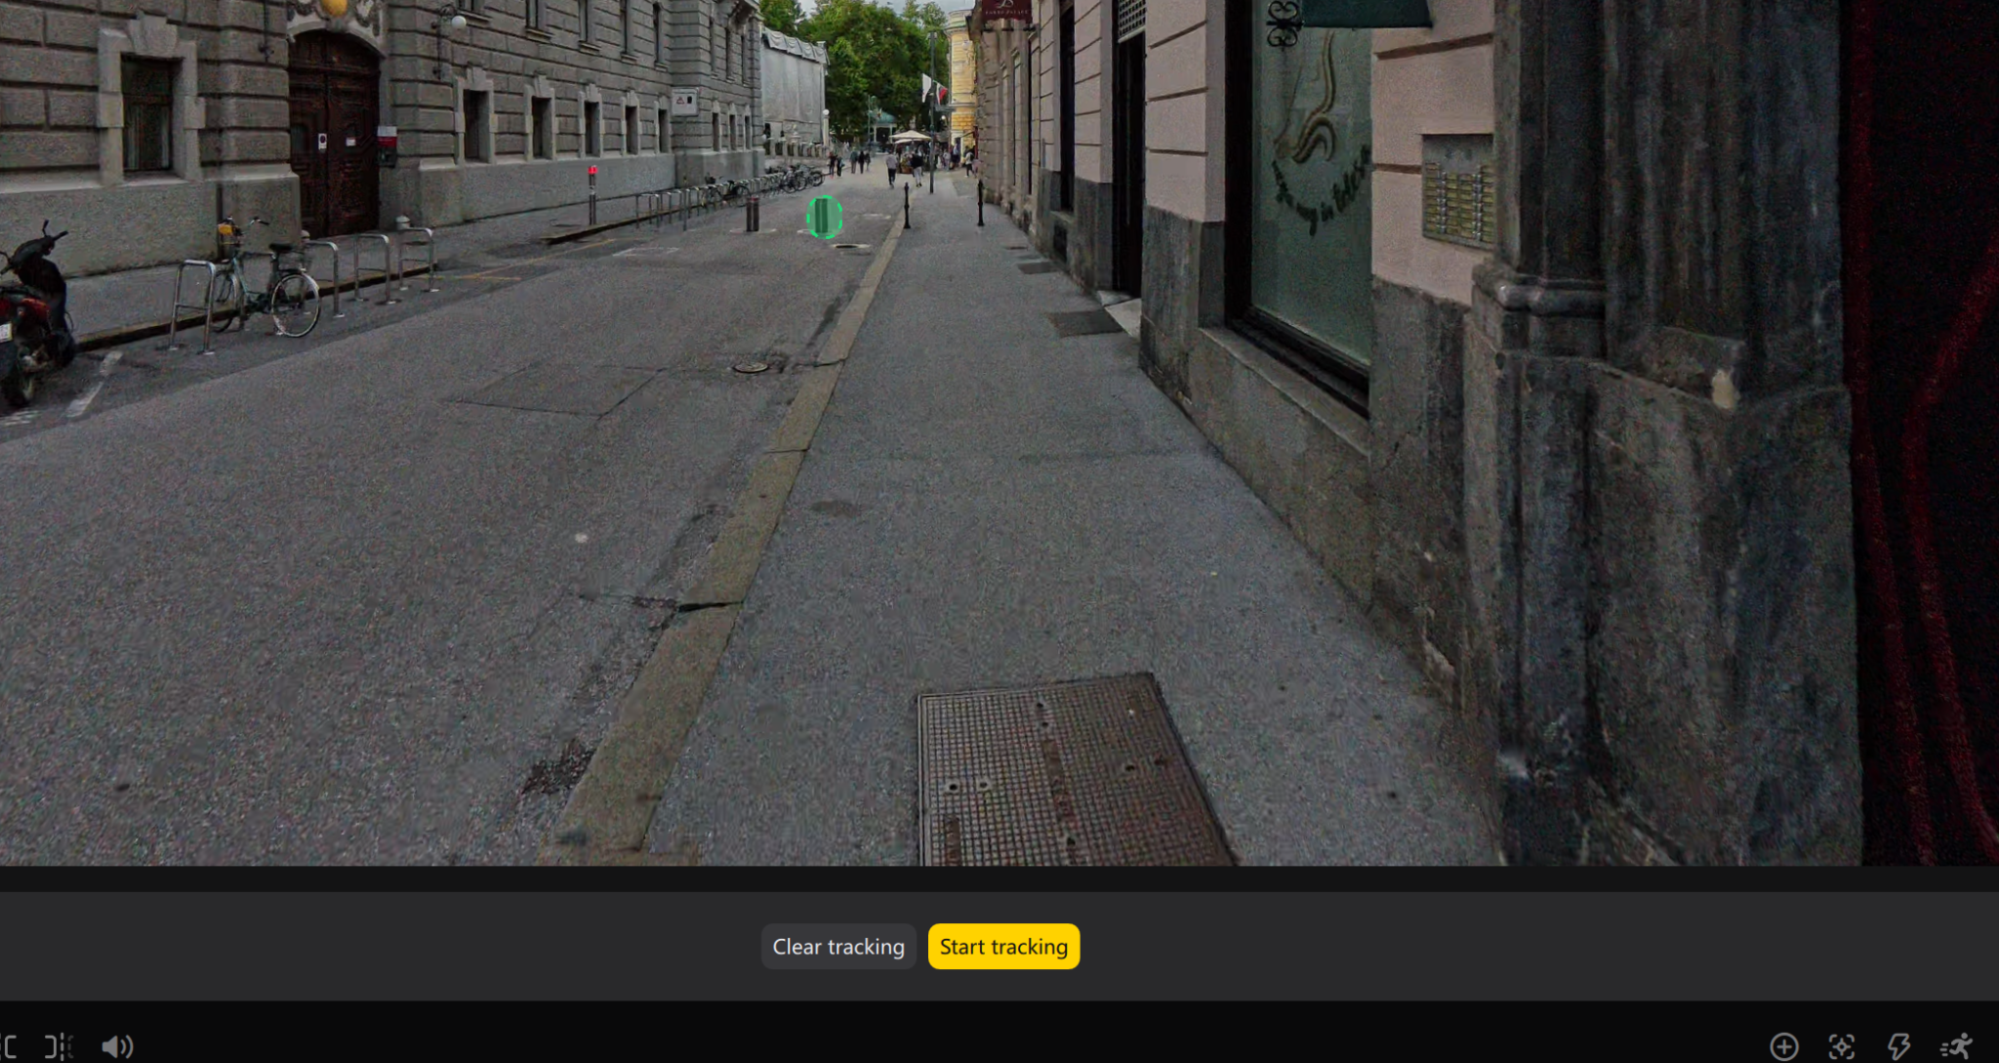
Step 5: Deep Track
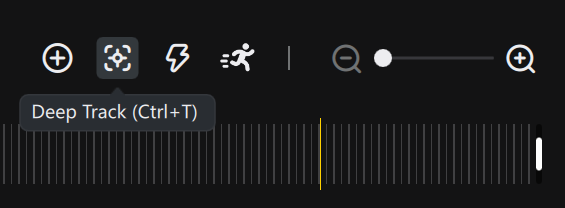
Use Deep Track to keep an object/person in the center of the view.
Steps:
1. Find your object in the preview.
2. Click the Deep Track button (next to keyframe button).
3. Highlight the object (green mask).
4. Click Start Tracking.
5. Stop tracking when the object moves out of view or tracking is complete.
Step 6: Color Adjustments
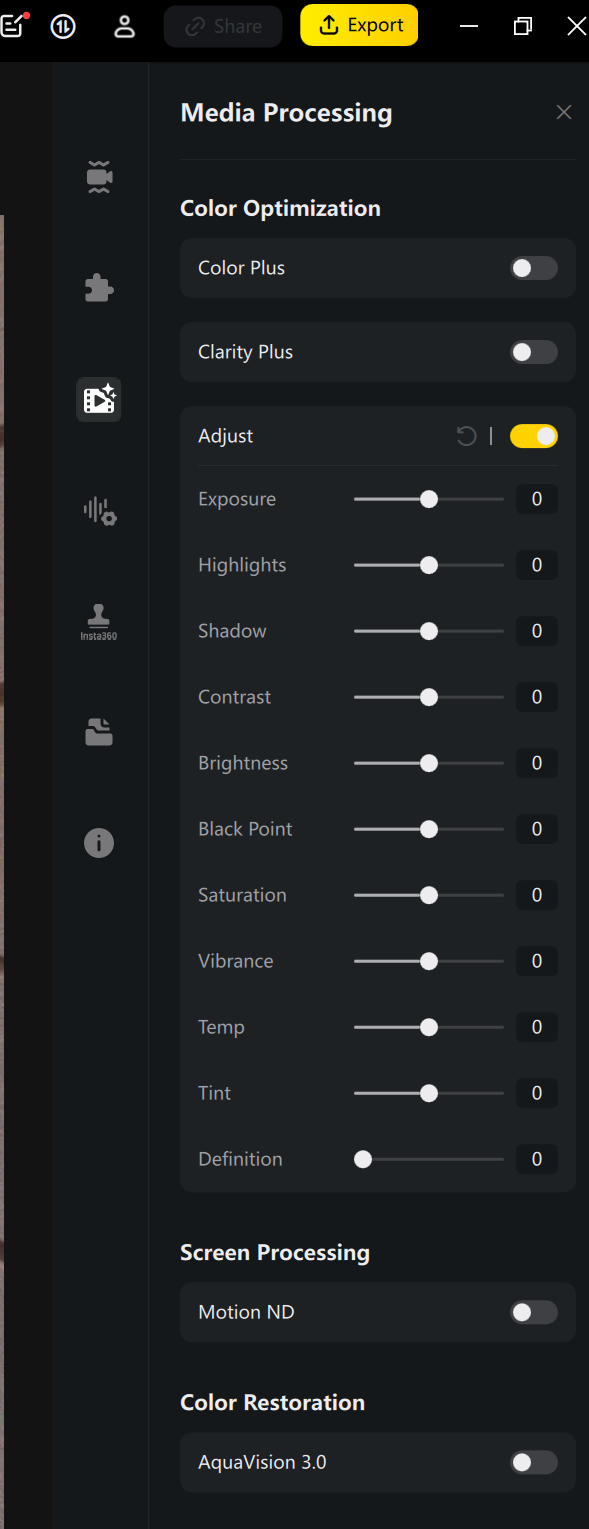
Use the Media Processing tab (top-right corner in Media Mode).
Experiment with color, brightness, and other adjustments to improve the look of your video.
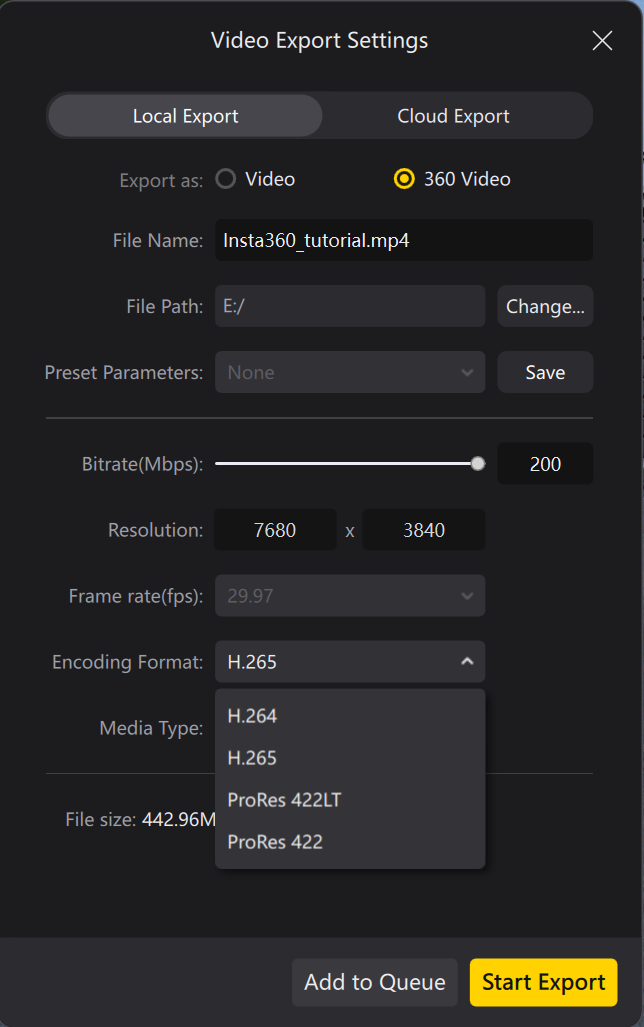
Step 7: Export Your Video
1. Click the Export button (yellow) in the top-right corner.
2. Choose Export Type:
- 360 Video: For VR content.
- Video: For a flat, square version.
3. Settings:
• Format: MP4 (H.265) — best for DeoVR.
• Resolution: 5760×2880 (maximum/original).
• Frame Rate: 30 fps (default).
• Bitrate: 200 Mbps (recommended for quality).
• ProRes: Use only if you plan further editing in other software.
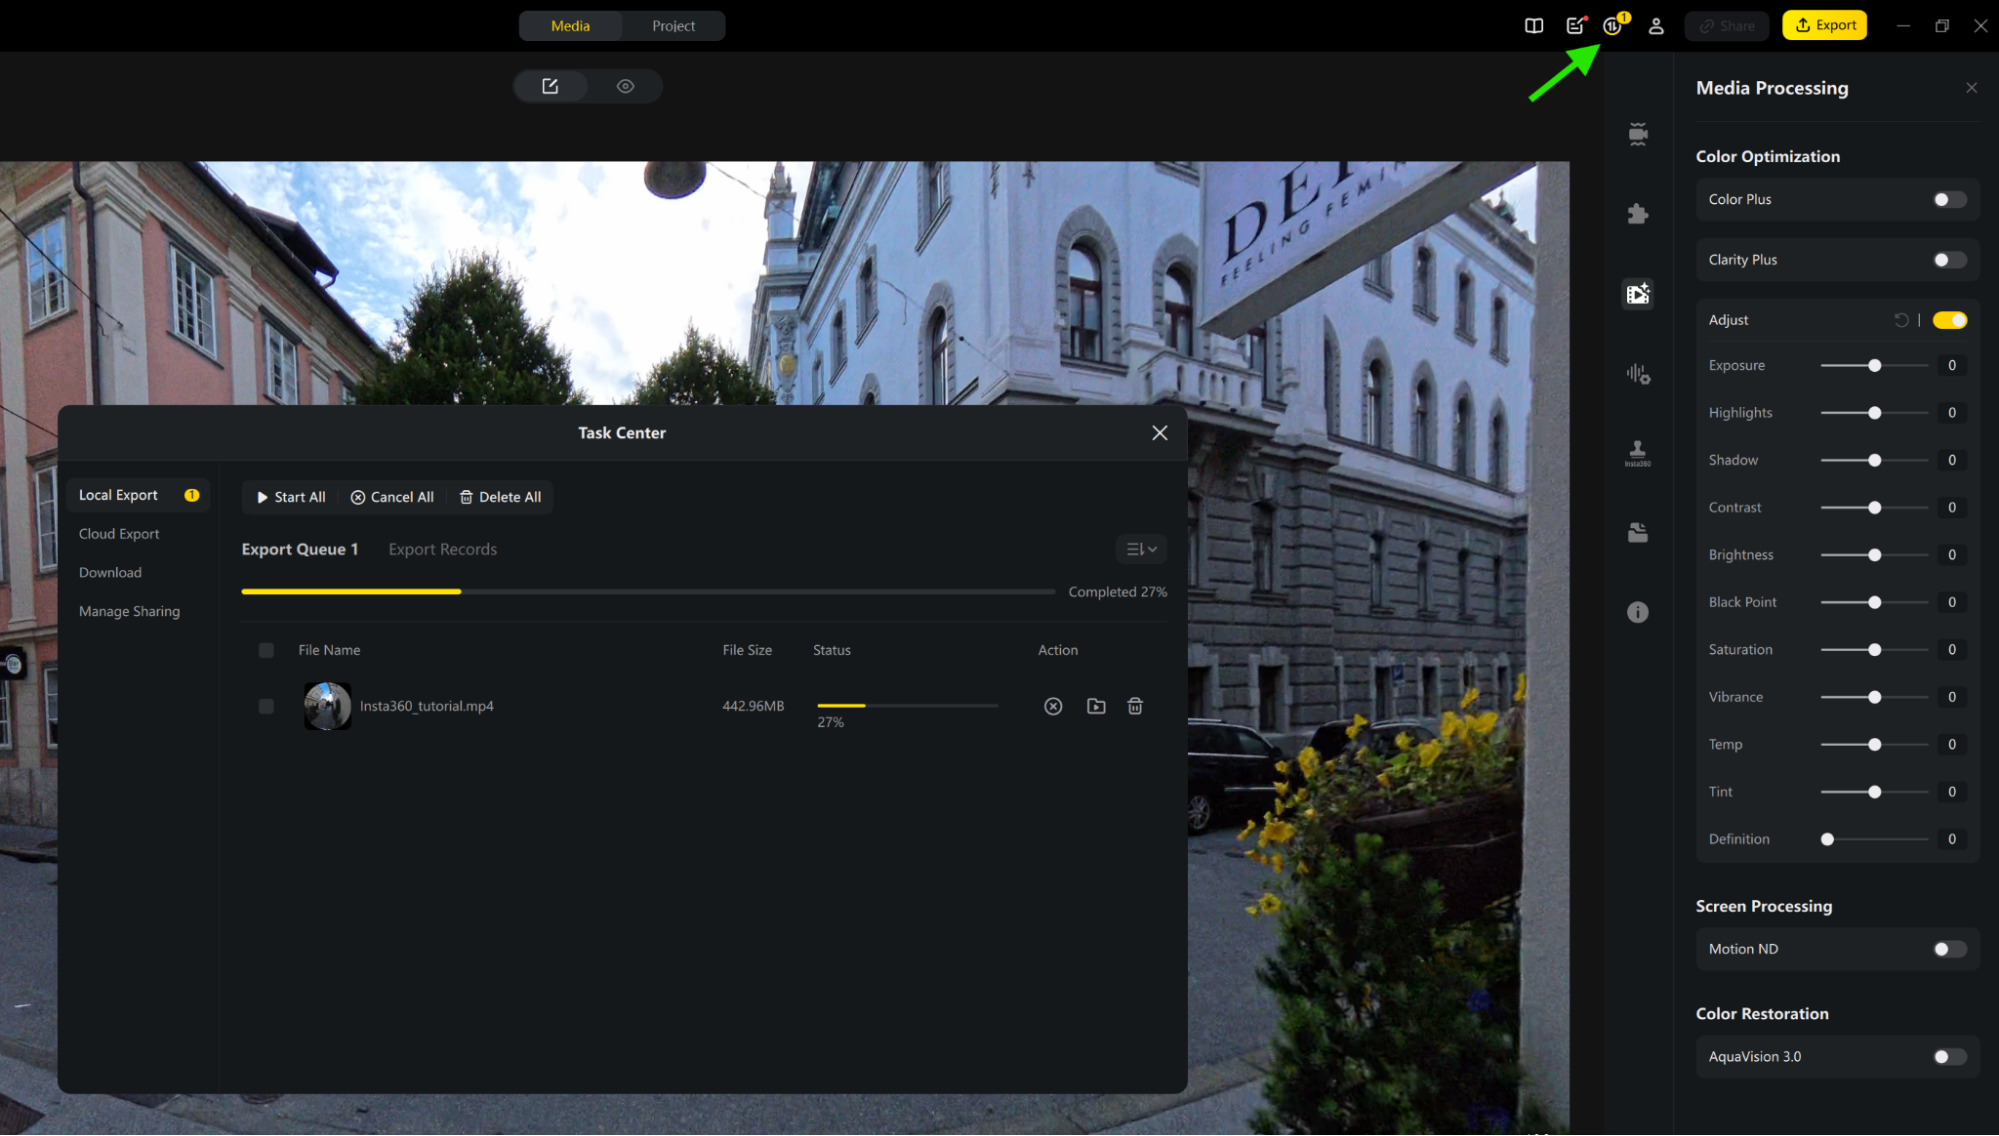
4. Click Start Export or Add to Queue (found in the Task Center).
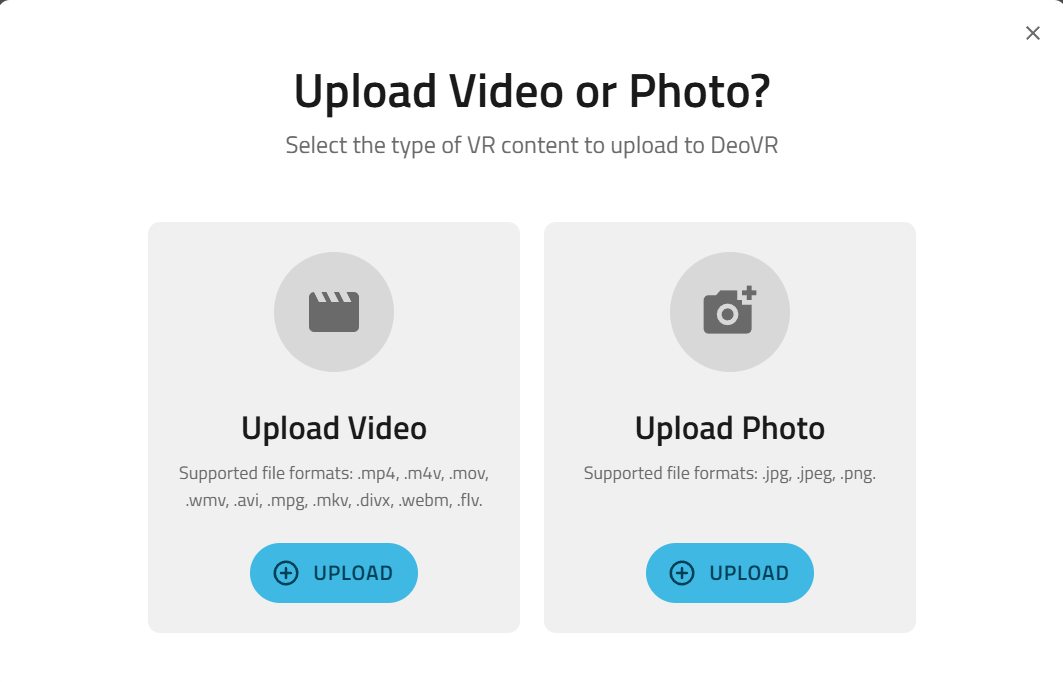
Step 8: Upload to DeoVR
- Go to deovr.com, log in or register.
- Click Upload Video (top-right).
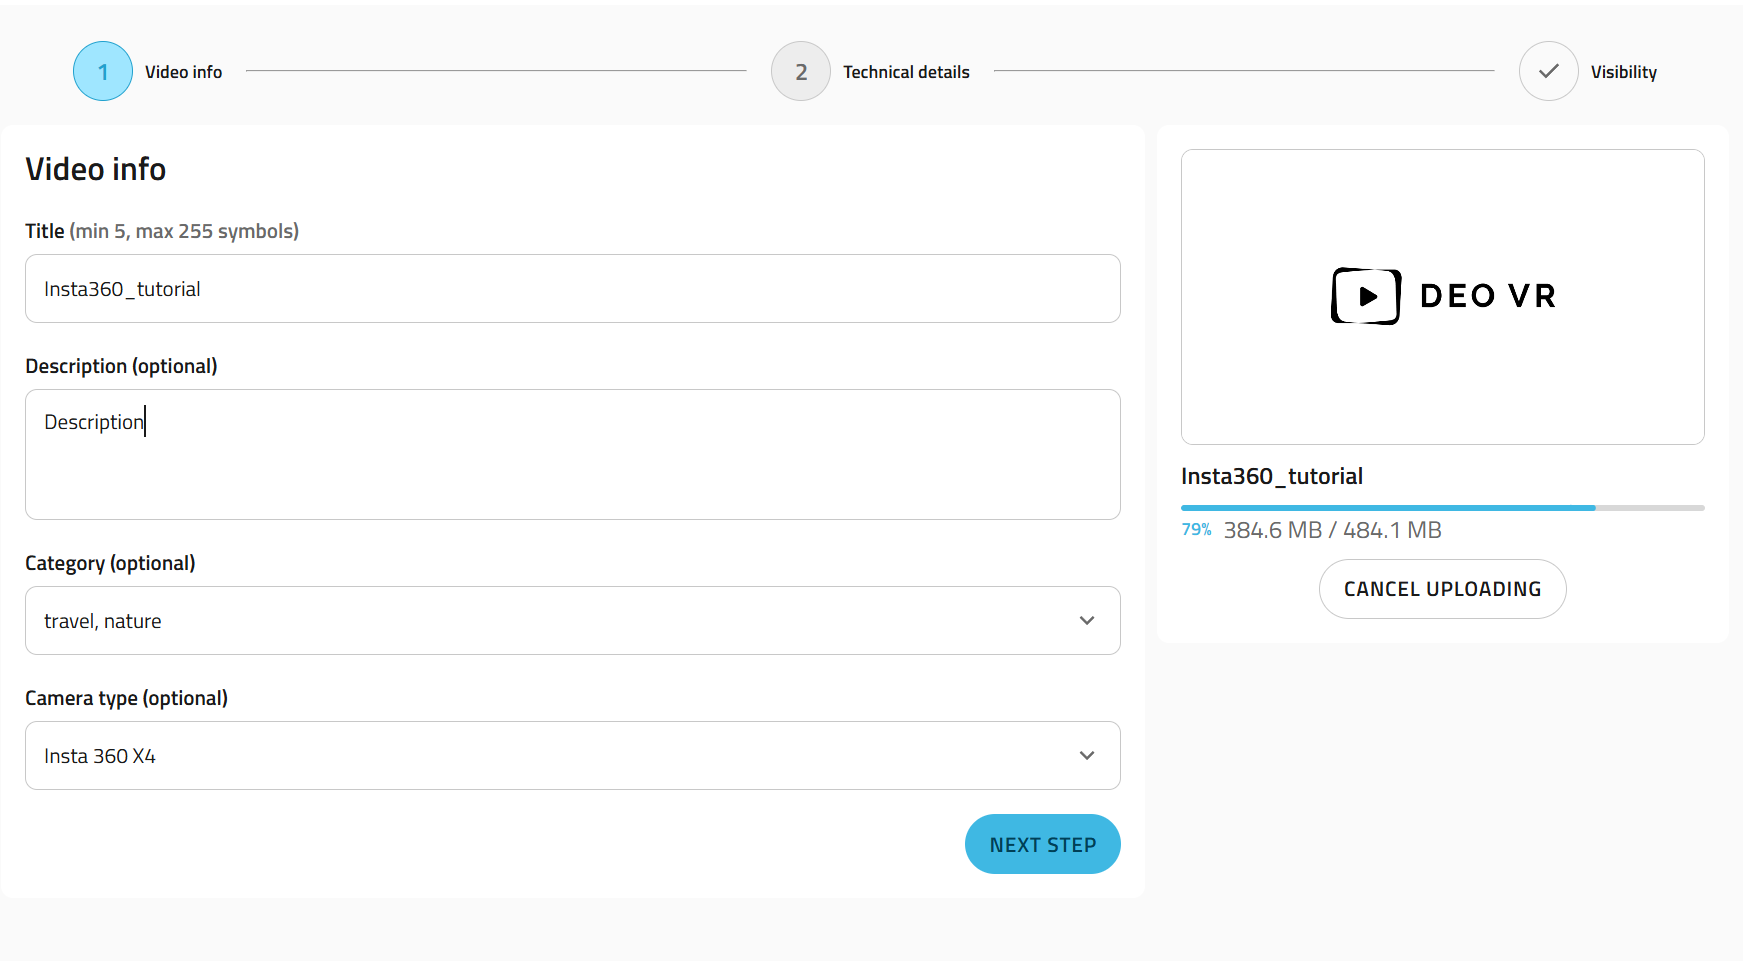
Add Video Details
Title & Description: Describe your video clearly.
Category: Select a relevant category.
Camera Type: Choose 360° or another option if applicable.
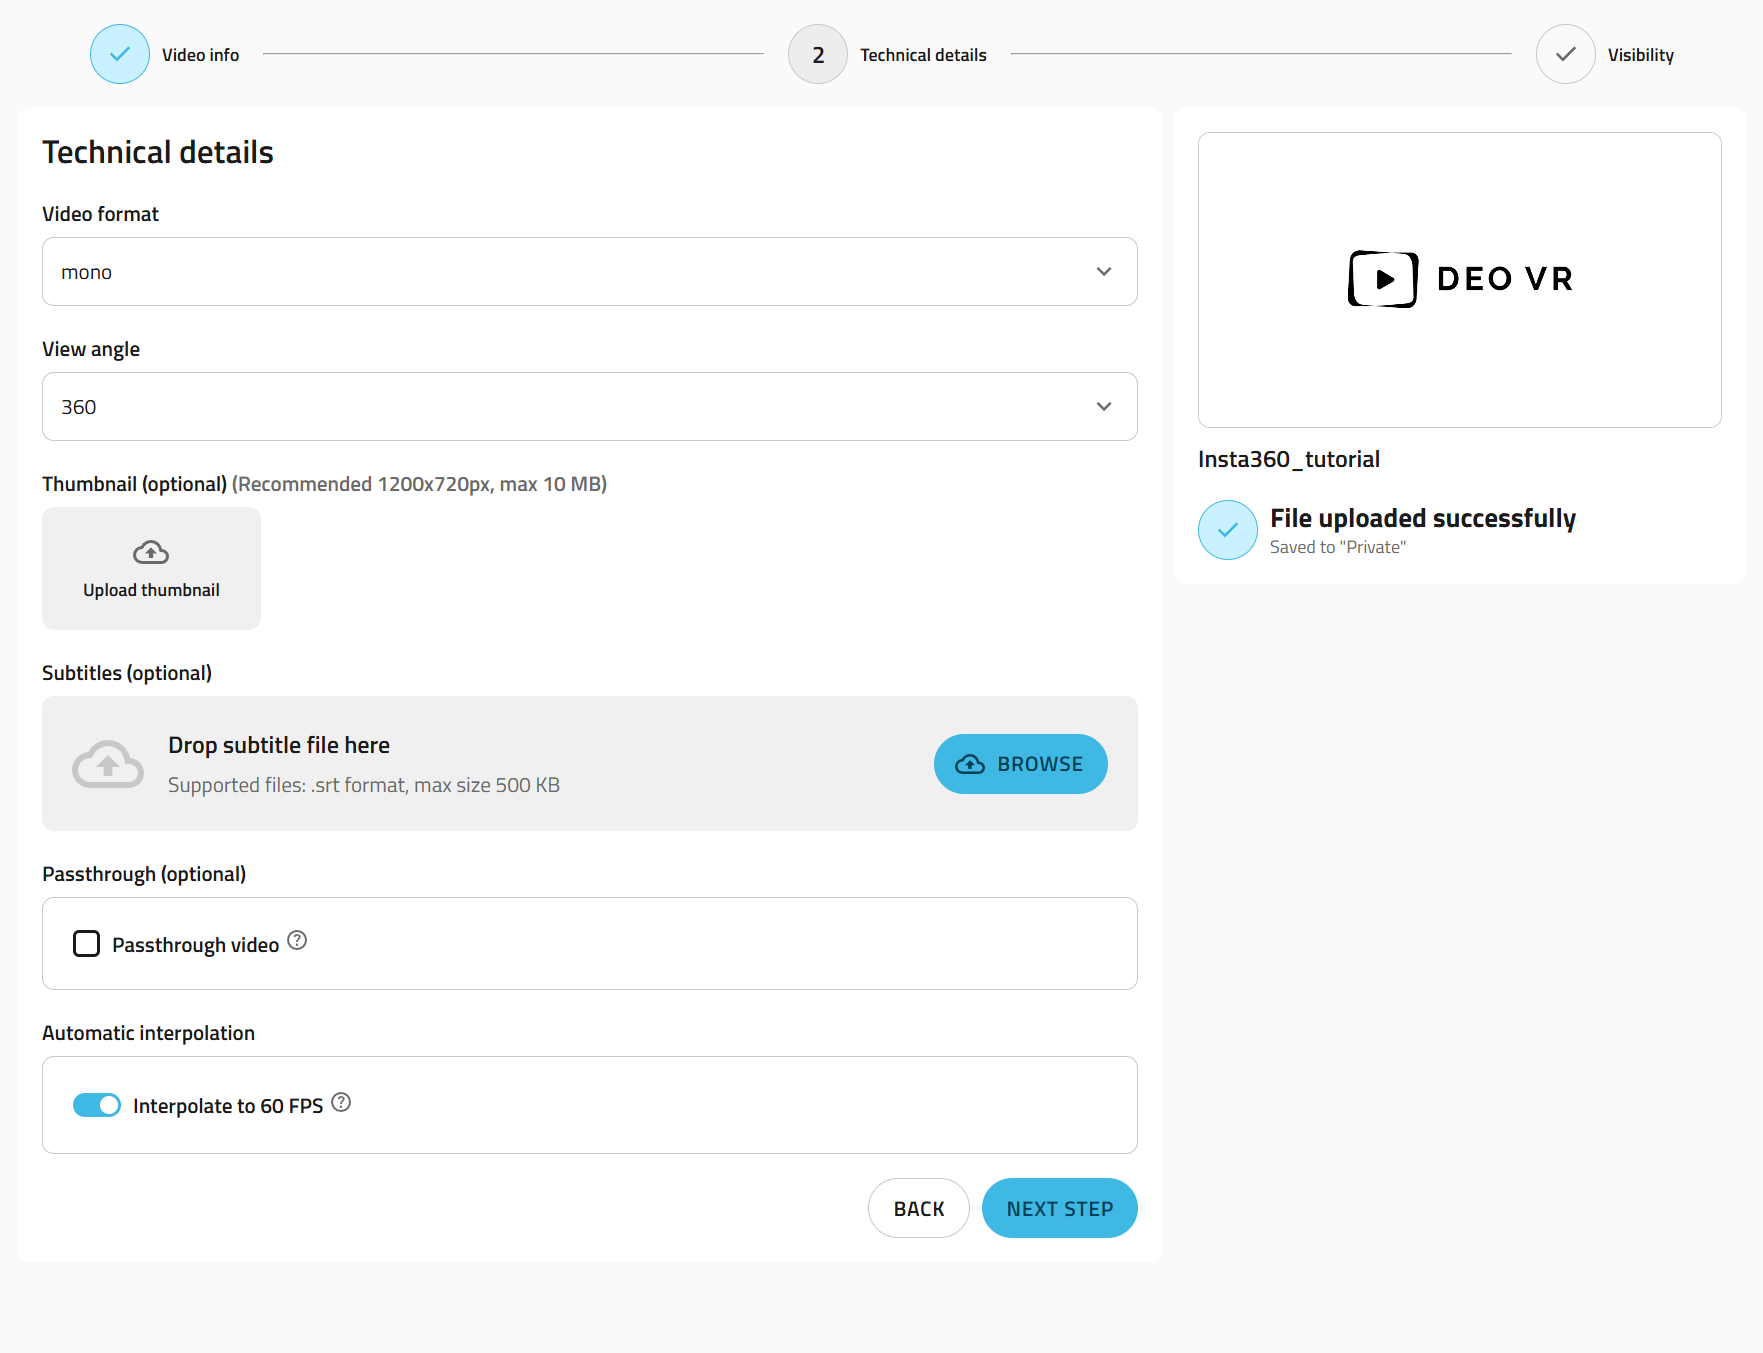
Technical Details:
- Video Format: Mono.
- View Angle: 360.
- Subtitles: Add if available.
- Passthrough: Enable if your video is passthrough content.
- Automatic Interpolation: Toggle if you want it interpolated to 60 fps.
Set Visibility & Publish
Private: Not visible publicly.
Unlisted: Only accessible by link.
Public: Published and visible.
Publish Immediately or Schedule: Choose when it goes live.
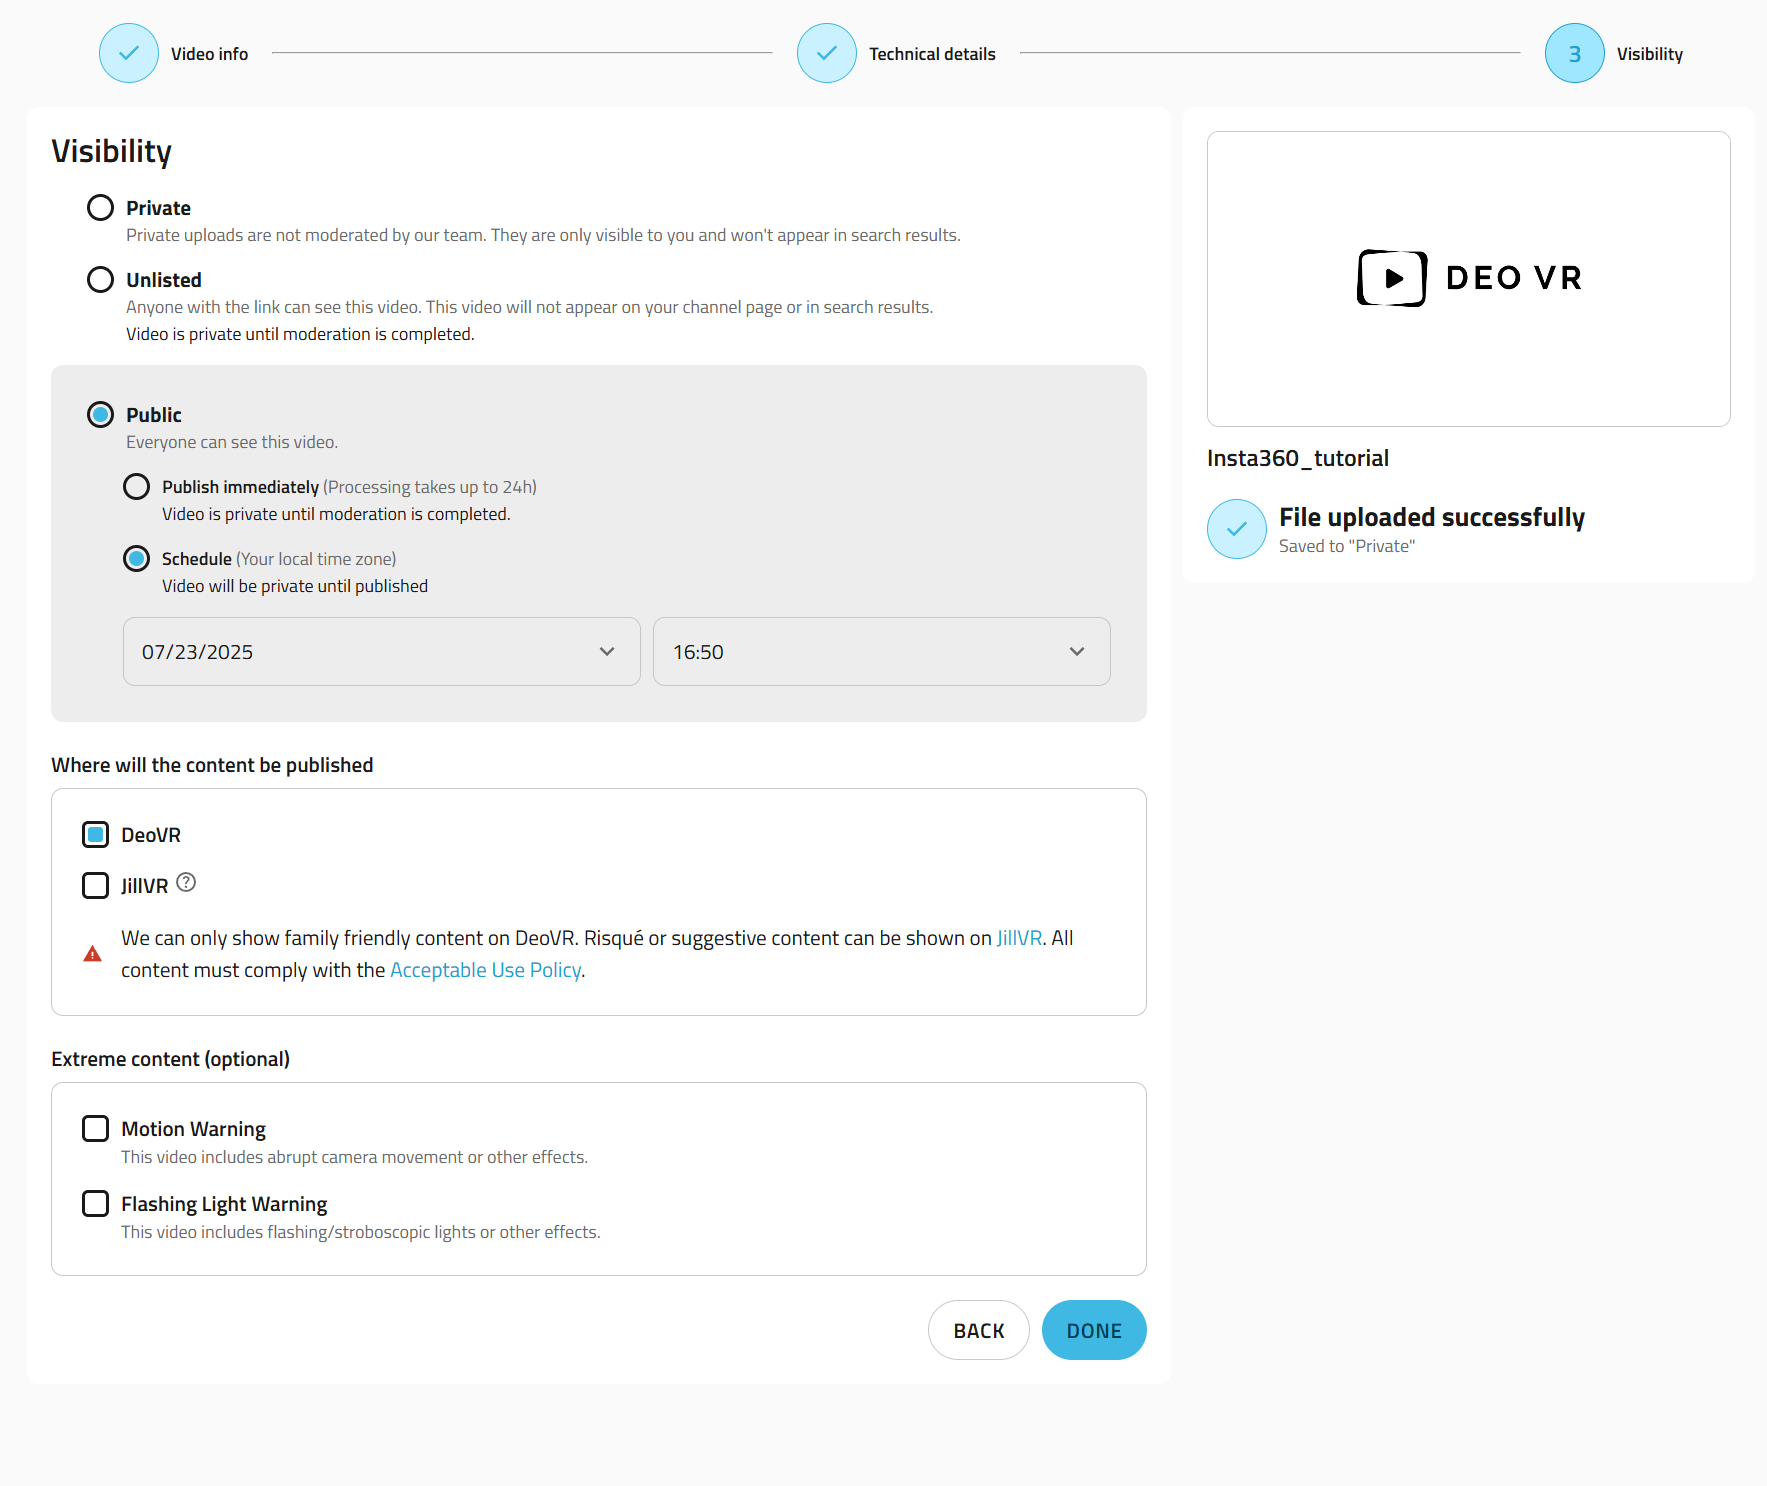
Select the platform (DeoVR, Jill VR) and add warnings if your video includes heavy motion or flashing lights.
Finalize Upload
Once upload and processing complete, your video appears on your channel page.
Manage your video:
- Edit Settings: Click the pen icon.
- Delete Video: Click the bin icon.
- Check Processing Status: Shown on the video thumbnail.
Visual Summary
For quick reference, here’s the simple 3-step process:
1️⃣ Import & Edit - Load videos in Insta360 Studio, trim, stabilize, and set view direction.
2️⃣ Export Video - MP4 (H.265), 200 Mbps, max resolution.
3️⃣ Upload to DeoVR - Log in at deovr.com and upload your video.
